
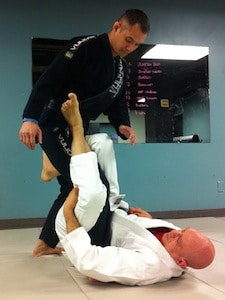
If you end up on the bottom with your opponent standing up and detached from you then be prepared for a very frantic and dangerous scramble. Unhindered by your grips and hooks he can deploy his favourite Open Guard passes on you without having to feel endangered by your own attacks.
Now of course one option is to use the separation and stand back up to your own feet using the technical standup (and for self defense this is a critical skill).
But in a sport context, what if his takedowns are better than yours? Or what if you just want to work your guard and not turn the sparring session into bad judo on your feet?
Well then, you’ll stay on the ground. But make no mistake: if he’s an athletic guy then the situation is serious. He’ll be able to use his speed and explosiveness to sprint past your legs – left, right, left, right – often ending up directly in sidemount or kneemount.
This sucks. To prevent this from happening you need to slow him down, set up your own attacks, and get your own momentum going!
There are many different ways to engage with someone who is standing above you, typically involving the Open Guard. But there are so many options that a lot of people get confused. What grips should they try and get, what type of Open Guard should they set up, and what should they attack with?
I’ve got a flowchart at the bottom of this article to help you with that, but first let me go into a bit of background…
Having to think about and evaluate all these options actually slows you down and makes it even easier of your speedy opponent to blast past your legs.
Yes, you can defend these speedy Toreando Guard passes (here is an article with a bunch of ways to counter the Toreando) but wouldn’t it be better to prevent it from ever happening in the first place?
So you need a plan. Having a plan ready to deploy (as opposed to trying to choose your response from the gigantic buffet table of all possible options every time) makes you faster.
It’s something that Mr Miyagi (or Yoda) could have said: “No thinking Daniel-san, only do!”
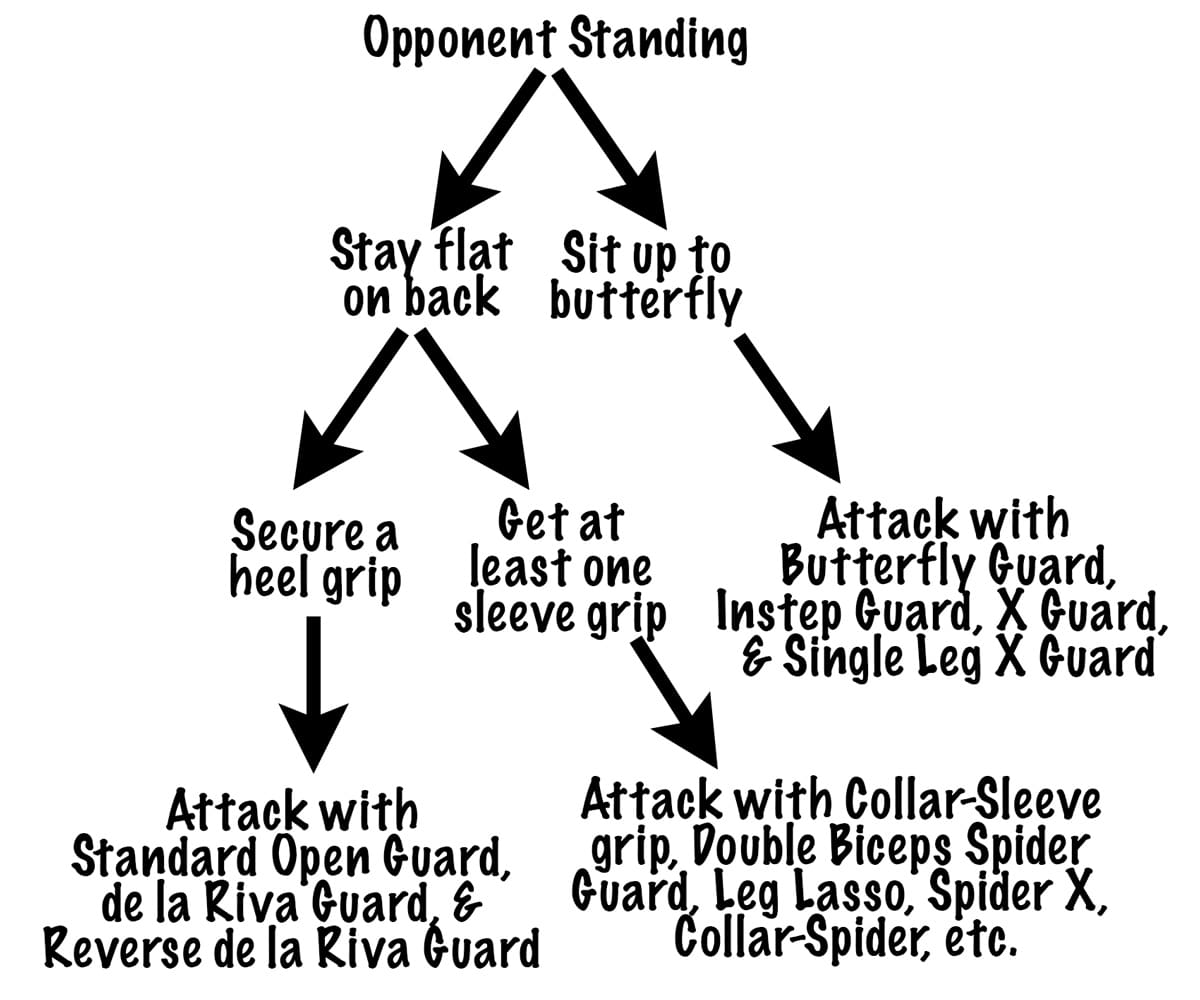
Fundamentally you have two options when your partner is standing up: you can stay flat on your back, or you can sit up. Everything else that you’re going to do next stems from that decision. So the first thing you need to do in building your plan is to decide whether you want to lie back or sit up. Choose one, you can’t have it both ways!
Let’s take a look at those two options, as well as the most common strategies used in each of those positions…
Option 1: Staying Flat on Your Back vs. a Standing Opponent
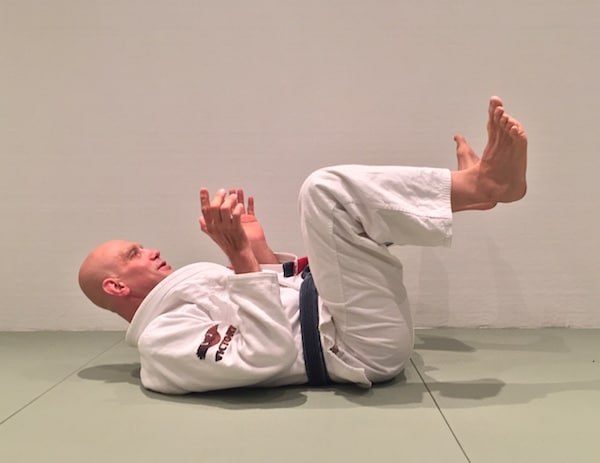
Staying flat on your back vs a standing opponent is a totally viable option. Many top competitors do this, and there are some very powerful attack options available from here IF you know what to do.
 In an MMA or self defense context in this position your head is fairly far away from his strikes, you can kick at his legs, body and head with your own legs.
At the same time you’ll likely be working towards getting back to your feet with some form of technical standup.
But in a BJJ context you can’t just lie on your back throwing bicycle kicks at your training partners – in most clubs that is frowned upon!
So where do you start? Let’s start with what not to do…
In the Open Guard you do NOT want your opponent to establish his grips on your legs without you getting your own grips too. If he has grips and you don’t, then unless you’re ten times better than he is – BOOM – he’ll pass your guard in about 2 seconds.
So when you’re flat on your back and your opponent is standing above you then the first thing you should be looking for in this position is to get a grip.
And if he grips cloth then you make damn sure that you grip cloth too (ideally you would get your grips while completely denying him any grips of his own).
What kind of grip should you be looking for from the Open Guard when you’re flat on your back? Well, once again there are two primary options initially…
On your back option 1: Control a leg by gripping the heel or lower pant cuff.
 If your opponent wants to engage you then he has to step towards you. As he does this at least one of his feet will come towards you. Don’t let this opportunity pass – reach out and control his heel with your hand.
By doing so you’ve limited his mobility and made it possible to start setting up a variety of offensive guard positions.
By controlling one heel and immobilising that leg you now have the option of using many powerful sweeps including the tripod sweep and the tomahawk sweep (or what I call the ‘Jab and Cross’ of Open Guard Sweeps).
But against really good players it’s a little bit dangerous to leave your legs dangling in space or even planted on his hips: they’re not very secure in that position and it’s relatively easy for a savvy opponent to dislodge, stuff or drag your legs out of position and then pass the guard.
Because of the dangers of your legs being forced out of position many high level players retain the heel grip but then entangle their leg around their opponent’s leg using either the de la Riva Guard or the Reverse de la Riva Guard. The following diagram explains the difference between those two positions…

Both the de la Riva Guard, and reverse de la Riva Guard positions require you to entangle your opponent’s leg with your foot and leg. This creates a very strong attachment and makes it harder to dislodge your leg, especially when you’re also tying up at least one of your opponent’s arms with your grips.
Sweeps from the de la Riva Guard and Reverse de la Riva Guard have won many tournaments. Click here and read down for a super-reliable attack from the de la Riva Guard, and click here on a primer on the Reverse de la Riva.
These two positions also work together. Many people will try to knee cut through your de la Riva Guard, and the Reverse de la Riva is a great counter to the knee cut pass. And many Reverse de la Riva passes can be countered by the skilful application of the regular de la Riva position. You can’t just do one – you have to do both.
Typically in these two positions you’ll be using one hand to control one of your opponent’s heels, and the other hand to control one of his arms. This is merely a rule of thumb – of course you sometimes have to let go of these grips when you move to apply a specific technique. For example the sleeve grip usually shifts to the belt or the lapel during the berimbolo sweep.
The heel provides better leverage on your opponent’s leg, but some top competitors prefer to control the cuff of the pants instead, feeling that this grip is harder to strip. Play with both options and see which works better for your game.
On your back option 2: Control at least one sleeve
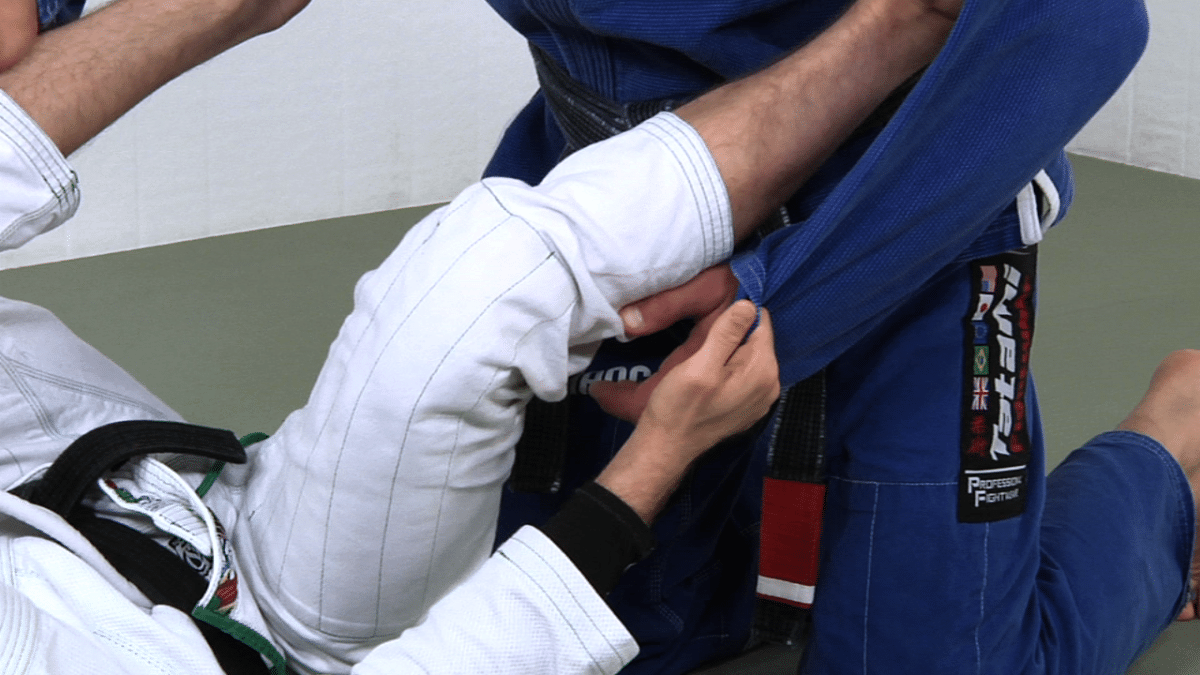
Controlling a sleeve is HUGE when it comes to defending the guard pass.
If you control at least one of his sleeves and know what to do with it then your opponent can almost be past your guard but you’ll be able to prevent him from stabilising the position and pop right back into the guard.
To see what I mean by this check out the Open Guard retention techniques demonstrated by Elliott Bayev and myself in the video below. Notice how many of the reguarding techniques rely on that sleeve grip…
But a sleeve grip doesn’t only help you defensively. It’s much more than that…
Controlling one or both sleeves sets up your offensive open guard game including many powerful sweeps and submissions! Most typically this will lead to some variation of the Spider Guard, including:
- Feet on Biceps Spider Guard (and the easiest move in Jiu-Jitsu)
- Leg Lasso Guard (and a spinning triangle choke attack)
- Spider X Guard
- The Collar-Spider Guard (and my favourite triangle choke attack)
- Collar-Sleeve Spider Guard
(Note that many of the above positions will flow into each other in real life. These categories aren’t set in stone and one position will transition into others depending on what both you and your opponent do.)
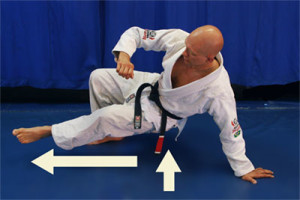
Now it’s time to talk about your other major option when your opponent is standing above you, namely getting off your back and up onto your butt…
Option 2: Sitting Up vs a Standing Opponent
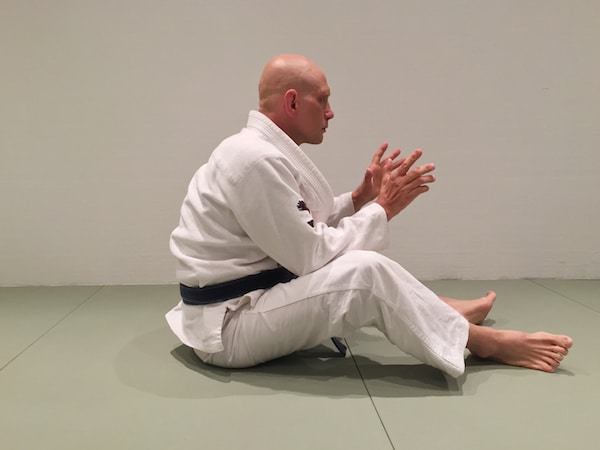
Another option when your opponent is standing above you is to sit up into some variation of the Butterfly Guard.
Some people think that the Butterfly Guard is only for dealing with kneeling opponents, but if you watch Marcelo Garcia compete for about 10 seconds you’ll see that’s not the case – it is a very effective tool against standing opponents too.
Furthermore some urban combative experts might malign this position as not being street worthy and combat ready, but in a self defense situation it’s easy enough to quickly return to flat on your back if you’re pressured by your opponent. From the sitting up position you’re also in an ideal position to plant a hand and hit a very quick technical standup to get back to your feet.
The most common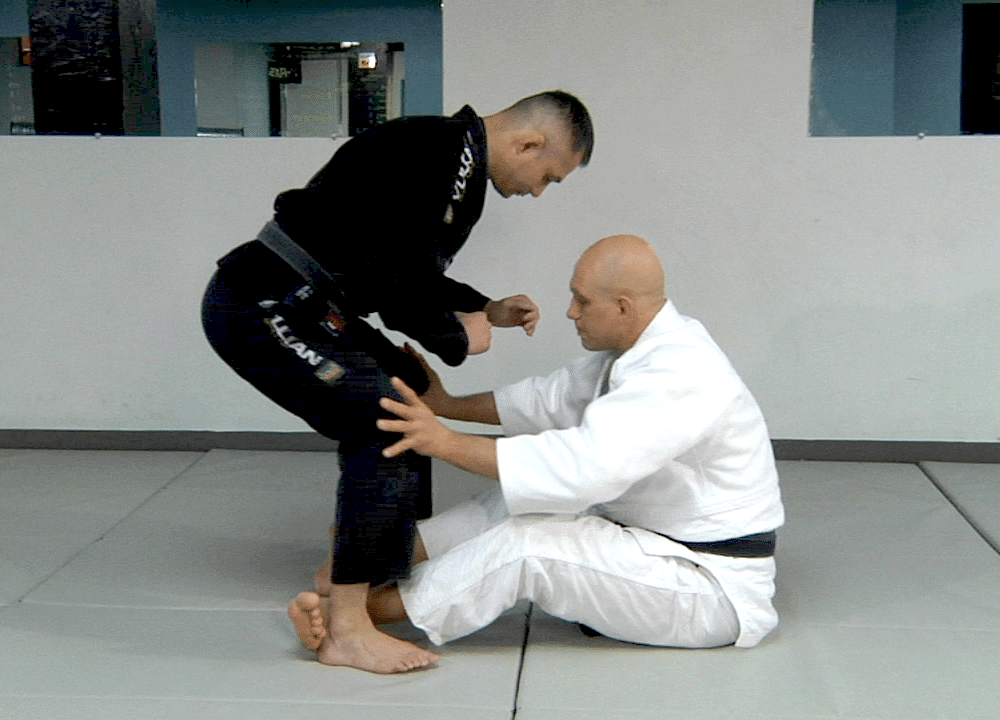 (and easiest) attack from Butterfly Guard against a standing opponent is the ‘Idiot Sweep’ (click here for a video breakdown of that sweep).
Even if you don’t topple your opponent over with the Idiot Sweep then you’re still keeping him off balance, making it hard for him to set up a decent guard pass attempt, and allowing you to move around to set up your own attacks.
The thing is that you can’t use the Butterfly Guard by itself – there are a few other types of guard that you need to become familiar with. All of these types of guard complement the Butterfly Guard, and you end up flowing back and forth between them in a real match.
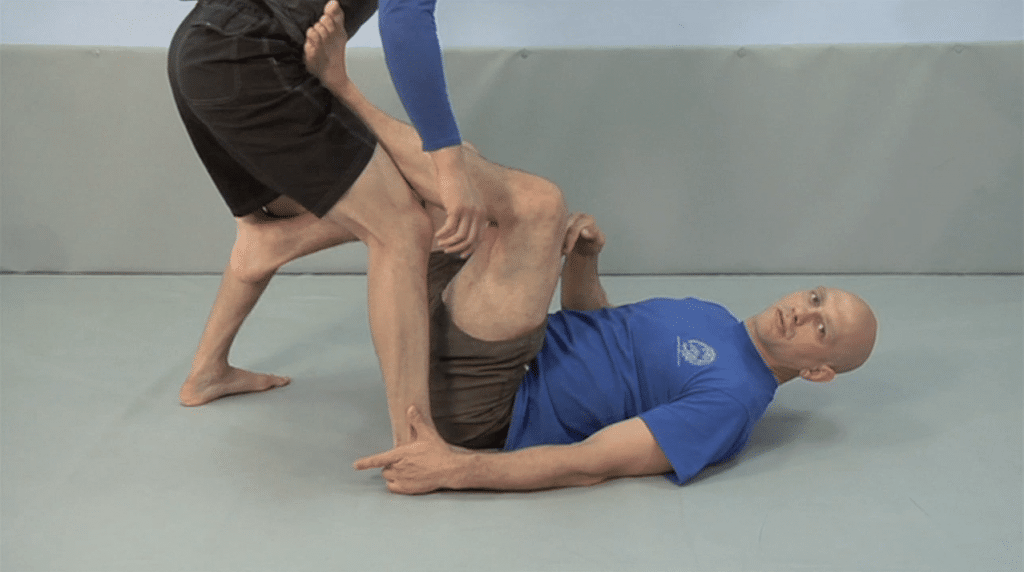
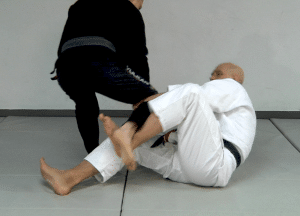 Butterfly Guard complementary guard #1: The Instep or Shin-to-Shin Guard
To apply the Instep Guard you put your left foot across the front of your opponent’s right foot (or vice versa), and then control the back of his knee with your hand or forearm.
This essentially turns your entire body into a gigantic ball and chain for your opponent’s leg, which means that he no longer has complete freedom to manoeuvre.
The Instep Guard slows your opponent down, making it harder for him to simply sprint around your legs. It also helps prevent the knee cut guard pass, which is a very common counter to the Butterfly Guard position.
From here you’ve got some very powerful offensive options too. You can elevate your opponent’s trapped leg, which then allows you to shift his weight, spin underneath him, and/or set up a whole bunch of powerful sweeps, submissions, and transitions to other positions.
You can’t really use the Butterfly Guard against a standing opponent without the Instep Guard, so make sure you include this position in your training.
 Butterfly Guard complementary guard #2: The X Guard
Essentially the X guard positions you between your opponent’s legs, and uses your torso and legs to split his legs apart and destabilise his base.
It is very common to use the X Guard to follow up after a failed Butterfly Guard sweep but if your opponent is already standing then there are many different ways to spin into this position.
To develop this X Guard mobility check out this clip of Clark Gracie showing a cool X Guard drill and sweep.
The X Guard is one of my very favourite Guard positions – I have long thought that if you manage to get to X Guard then you’re essentially 80% of the way through the process of sweeping your opponent. By the time you get here the hard work has already been done, and now it’s time to enjoy the fruits of your labor!
There are many ways to use this position to sweep or submit your opponent. Here is the first sweep you should probably try when you find yourself in X Guard.
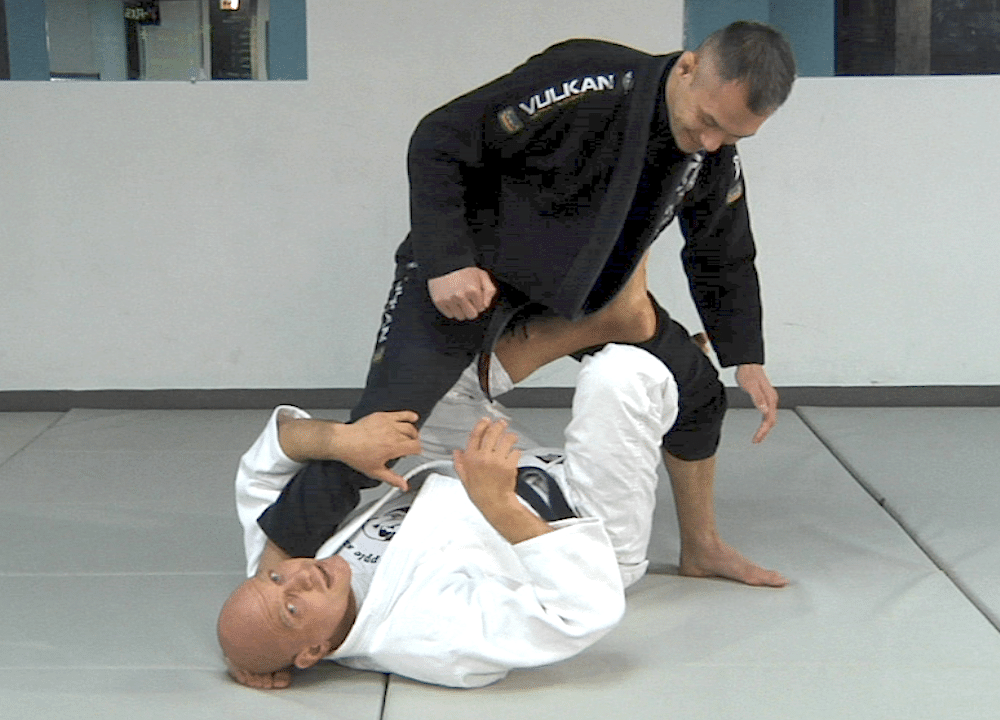
Butterfly Guard complementary guard #3: The Single Leg Guard
This position looks a lot like a leglock, but it’s actually a very powerful sweeping position.
The X Guard and the Single X Guard work together. Most of the time your opponent will attempt to counter your Single Leg X Guard by peeling your foot off his hip (my left foot in the case of the photo I’ve posted). But by doing that he gives you exactly the energy you need to transition into the X Guard.
And fortuitously, many of the ways he’ll then try to escape your X Guard will lead him right back into the Single Leg X Guard. Deja vu all over again!
The Single Leg X Guard requires a leap of faith. I’ve described the entry to this position as throwing yourself under your opponent giving him mount, but then keeping one shin underneath him to prevent him from stabilising the position.
Here’s my favourite way of moving from the Butterfly Guard into the Single Leg X Guard using the Instep or Shin Guard as an intermediate position. Check it out:
And here’s a way to get into the Single Leg X Guard from standing – if you can do it from your feet then it will seem much easier when you try to slip into the same position from the Butterfly Guard!
Summary of Open Guard Options
To sum up, here’s a simplified flowchart of what we’ve been talking about. Please note that this doesn’t cover every form of Open Guard; it’s really just to get you through the first 5 seconds of engaging with an opponent who is standing over you and trying to pass your guard.
Where you go from these initial positions depends on what techniques you try, what techniques your opponent tries, and what each of your reactions are. But at least you now have an initial gameplan for the initial chaos of a match!
I hope this helps demystify the process of choosing which Open Guard position you should use in the heat of the moment…
P.S. If you like this flowchart, click here to go to a page where you can download Elliott Bayev’s flowchart and mind map of the Spider Guard, including all the most powerful variations, sweeps and submissions.
P.P.S. For a crash course on the Butterfly Guard, the X Guard and the Instep Guard check out my 7 Days to Better Guard Sweeps video.
The post Your Open Guard Options vs. Standing Opponents appeared first on Grapplearts.