Thanks to Eduardo de Lima for demonstrating this technique, and to Matt Kirtley for taking the photos and writing the descriptions. For more information, or to contact either person, please visit Gracie Barra Clearwater – Stephan Kesting.
If the crucifix choke is underused, then the reverse (or inverted) omoplata is almost unknown or at least considered an exotic novelty. Hopefully, this instruction will help change that.
A possible reason for this is that one of the hardest parts of the reverse omoplata is simply having faith in it. When most people are taught it, they blow it off as some impossible technique without even giving it a chance.
You have to be willing to take a “leap of faith” when you first start trying it. Once you get it a couple times, you’ll find that it’s not as wild as you thought, though it does require confidence in your movements, which will come with drilling.
While showing this move once, Eduardo told the class, “You’re all looking at this and thinking ‘Oh, that’ll never work—that’s crazy.’ But ask any of the brown belts in the room, and they’ll tell you I get them with this all the time.”
So have faith and practice, and it’ll come to you!
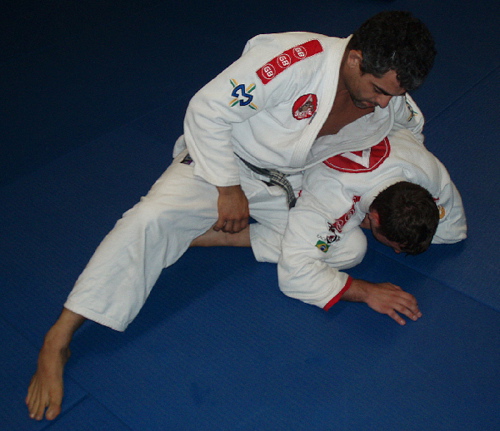
You have side ride on a turtled opponent, similar to how you set up the clock choke. Your chest is across his back, and you’ve got a one-on-one (one hand grabbing one wrist) on his far arm. Your outside leg is posted away from him for base.
To take the crucifix, you need to expose his near arm. Do this by driving your knee under his armpit and pushing his arm out.
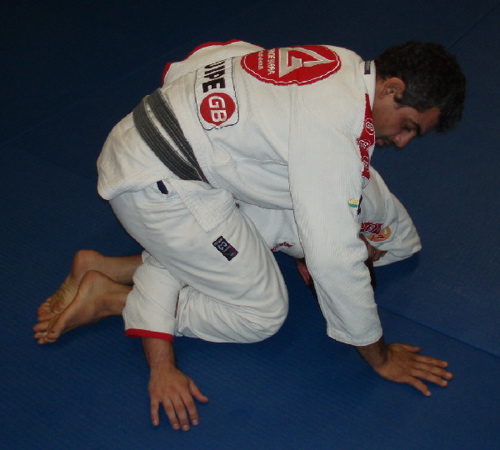
Step over his arm with your outside leg and drag it back, trapping it between your kness. If he is trying to hide his arm, you might have to dig some with your foot to get your heel to catch it.
All of the normal rules of the crucifix apply. Keep your knees pinched tight and your hips close to his shoulder so he doesn’t have room to pull his arm out. Your free hand posts on the mat in front of him to keep base if he starts trying to take you down.
At this point, you could roll to the traditional crucifix like we did before, but we’re going to take another route.
Pay special attention to the next two steps. They are tricky to get even with live instruction, and even harder to show in still photos. You’ll need to experiment with this part to get a feel for the footwork.
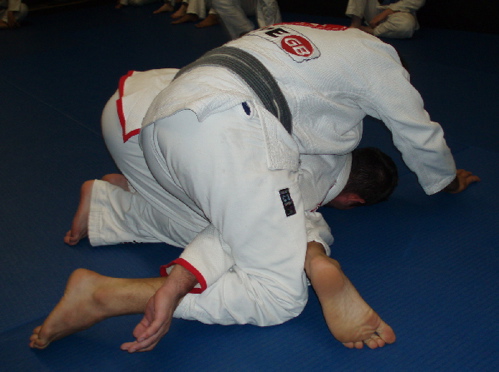
Cross your right knee over your left leg, bringing his arm back. Your goal is to pass his arm from one leg to the other. Your left heel will need to trap his arm so you can uncross your legs without his arm coming back.
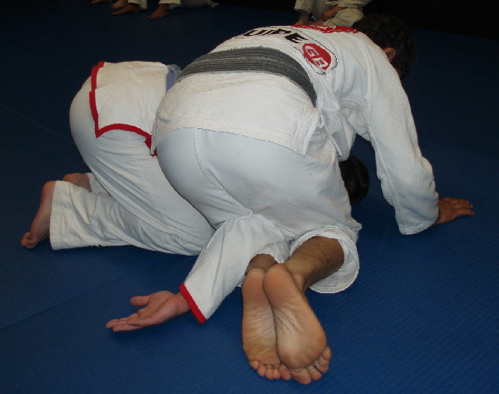
When you uncross your legs, his arm should remain pointing back, stuck behind your left leg. Opponents will often hug this leg and try to take you down, not knowing what’s in store.
When people see this for the first time, they almost always ask “What’s stopping him from just uncrossing his arm?”, since it looks like it would be really easy to do.
Luckily, it’s not.
All you have to do is keep your left leg bent, and your heel will block his arm from returning to the other side. He can never straighten his arm (which is what he needs to do to free it) further than you can bend your leg to block it.
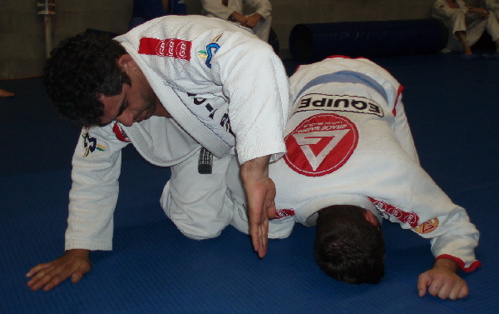
With his arm crossed back in the right trigger position1, let go of your one-on-one and bring your entire upper body to his right side. You’re going to dive your left hand underneath his near shoulder as you roll over your left shoulder.
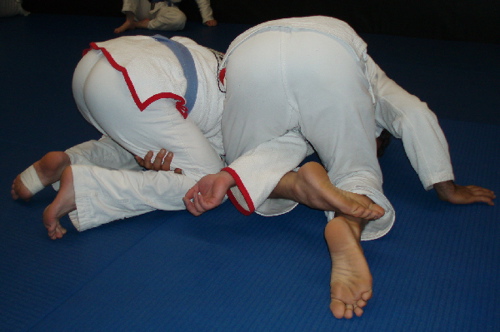
As you start rolling, reach back with your left hand and grab his knee, and triangle your legs to secure his arm.
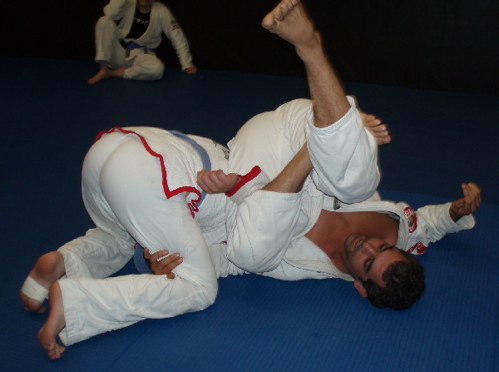
Continue rolling, still holding his knee and triangling your legs.
He’s probably already feeling the pressure on his shoulder, and if you do it fast enough, it’s possible to submit him from here. But because we don’t feel ballistically ripping your training partner’s shoulder off, we’ll continue the move with control.
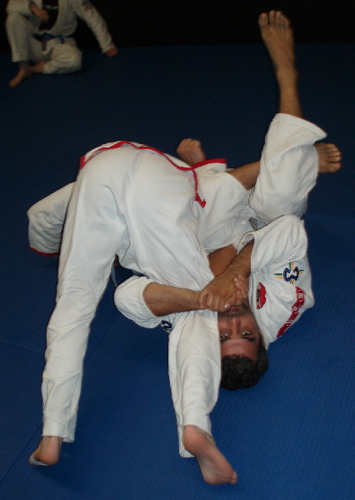
Walk your shoulders towards his knee as you pull it to your head and hug it. This is to help you control three possible situations:
1. He rolls to escape the pressure on his shoulder.
2. You want to roll him to finish him on his back.
3. A mix of both.
It’s easier to finish him on his back if he’s too strong or flexible to finish upside down, or if he’s defending by holding his belt or grasping his hands together.
The easiest and most direct way is to keep rolling until you can sit up, lifting his knee and cranking his arm with your shoulder. He’ll often go right along with this to relieve the pressure and avoid the submission.
If you’re having trouble rolling a heavy guy, you can untriangle your legs and swing your right leg out like you’re doing a pendulum sweep, while rocking up and lifting his knee. This adds more momentum to the roll and can tip the balance.
If he resists rolling by posturing up, you can often take it the other way by sitting back into him and knocking him backwards instead of forwards.
He might also try stepping over you, in which case you can roll belly down and sweep him like a normal omoplata sweep.
Whatever happens, just get him on his back without losing control or letting his arm slip out.
While drilling, just stick to rolling him forward.
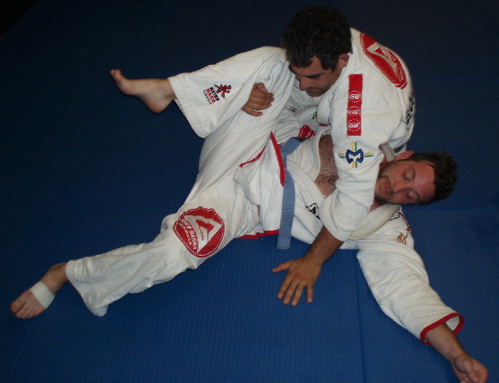
One way or another, you’ve now rolled him on to his back.
Keep holding his knee to maintain control and stop him from rolling out, and keep your hips tight to his body so he doesn’t get the space to pull his arm out.
Reach across his body and put your left hand in his far armpit. Lay across his upper body to pin and block him from sitting up. This position will feel natural if you’re familiar with reverse scarf hold.
Before you start trying to crank his arm, scoot your hips back to take the slack out of his shoulder—you won’t have the leverage to finish otherwise. This will also break any defensive grip he has such as holding his hands or belt.
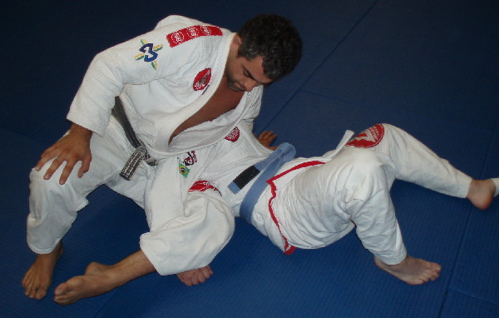
Finish by posting with your outside leg and bringing your inside leg back like you’re doing a technical stand-up (your leg going under your hips).
Definition: A ‘trigger position’ is when your opponent has some part of his body in a position that prompts you to do a particular move, such as someone pushing on your chest from under mount being a “trigger” for an armbar.
| Techniques by Eduardo and Matt on Grapplearts include: |
The post Step-by-step reverse omoplata appeared first on Grapplearts.
