
Recently we discussed the concept of ‘posture’ and how it applies when you’re pinned underneath someone. A few people have contacted me since then, asking for specific examples of posture while pinned.
Let’s start with with just one pinning position: here are the three most common postures used to defend submissions and set up escapes while pinned in sidemount. These postures all assume that your opponent is on your right side and that you’re defending the mount by placing your left knee on his right hip.
In the first posture the arm furthest from your opponent (i.e. your left) is pushing the left side of your opponent’s neck and jaw using the bottom part of the forearm. Your other arm is pushing into your opponent’s left hip, again using the bottom part of the forearm. This posture lends itself most naturally to putting your opponent into your guard, but can lead to other escapes if your opponent blocks your reguarding attempt.
| Posture 1: First Angle. Note the forearm on the neck/jaw area |
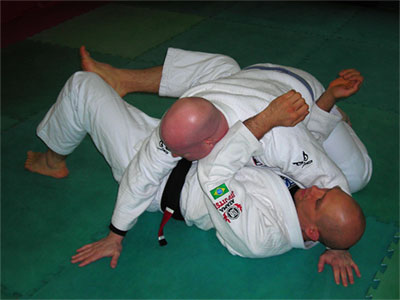 |
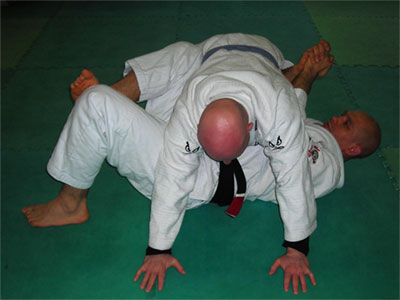
| Posture 1: Second Angle. Note the forearm/elbow pushing on the opponent’s hip |
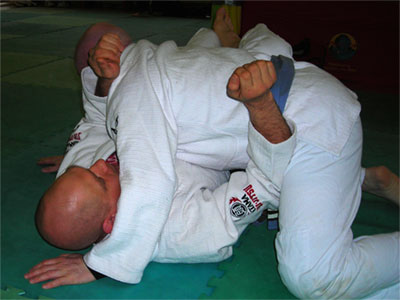 |
| In the second posture your far (i.e. left) arm goes under your opponent’s right armpit and your near (right) forearm pushes his hip (just as above). Usually when you are in this posture you will bridge and try to throw your opponent over your head with your left arm while turning to your left. If you do this move correctly you should end up on your knees, either on top of him and ready to take his back, or under him and in position to attack with a low single leg takedown. | |
| Posture 2: First Angle. Your arm is buried under your opponent’s right armpit |
 |
| Posture 2: Second Angle. Another view of your arm position |
 |
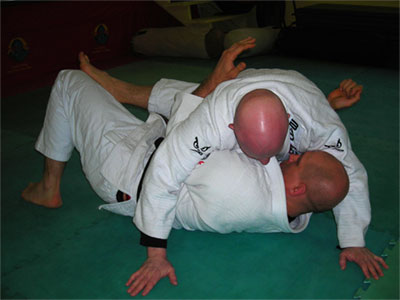
| In the third posture your far (i.e. left) forearm is in your opponent’s left armpit and right forearm in its usual place, pushing against your opponent’s left hip. This posture resembles the ‘don’t shoot, I surrender’ hand position. Once here, I usually start bridging to both sides, pushing with my arms, sometimes with my hands apart, and sometimes with my hands clasped together. This is very destabilizing for your opponent, and eventually an escape opportunity will open up. | |
| Posture 3: First Angle. Your arms block both the hip and armpit on your opponent’s left side | 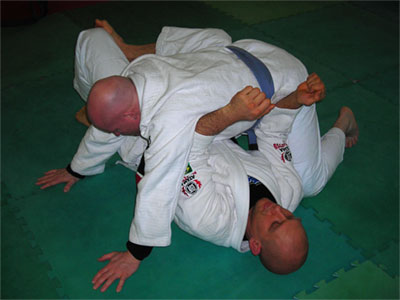 |
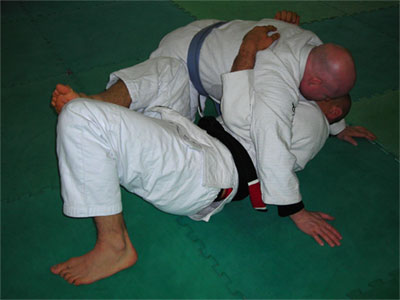
| Posture 3: Variation. Your arms still block his hip and armpit, but this time your hands are clasped together |
 |
Check out this followup article sharing strategies on how to achieve posture when pinned – as I’ve said before, achieving correct posture when you’re on the bottom can often be the toughest part of the escape battle.
The post Posture Under Side Mount appeared first on Grapplearts.